
Scroll to read the featured post
The Journal

How to Batch Rename and Resize Your Website Images Using Adobe Bridge
Images are a vital part of every blog post. They add visual interest, convey information, and make your post more engaging for readers. However, using high-quality images can often cause a decrease in loading speed, which can adversely affect your website’s performance and SEO. That’s where Abode Bridge comes in! When you batch rename and resize your website images using Adobe Bridge you save time and make sure your images aren’t slowing down your page loading speed, which as a result, will help with SEO.

How To Batch Compress And Resize Your Images With Adobe Bridge:
01. Download or Open Adobe Bridge
If you don’t already have Adobe Bridge, you can download it here. If you already have Adobe CC, it will be included in your subscription.
02. Organize and Locate Your Images
Locate the group of images you would like to work with and add them to a folder on your desktop for easy access.
03. Batch Rename Your Images
Batch rename your images from here by selecting all your images and going to Tools > Batch Rename. A new window will pop up where you can input your new image names.
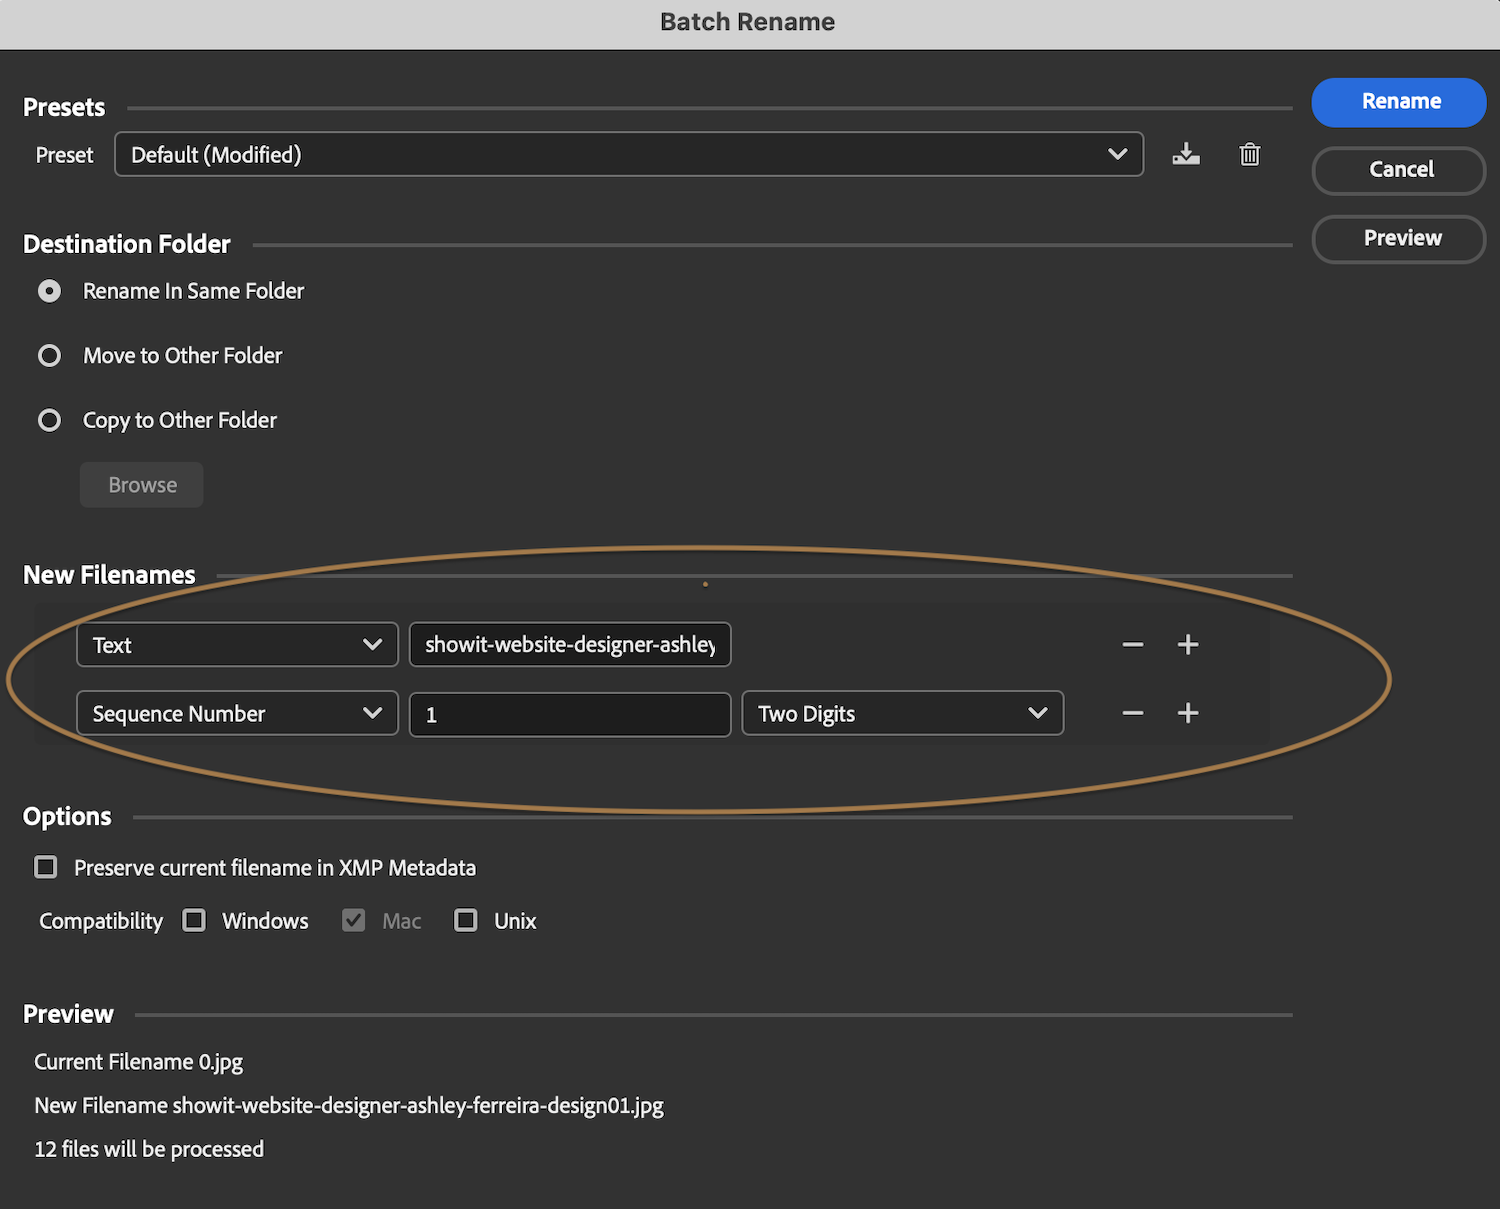
File Naming: Below are some tips for naming your images:
- Keep your image names simple and straight to the point by describing what they’re about.
- Add your brand name at the end of the image file name.
- Put yourself in your client’s shoes and think about what they would be searching for when trying to find a business like yours.
- Include relevant keywords.
04. Resize Your Images
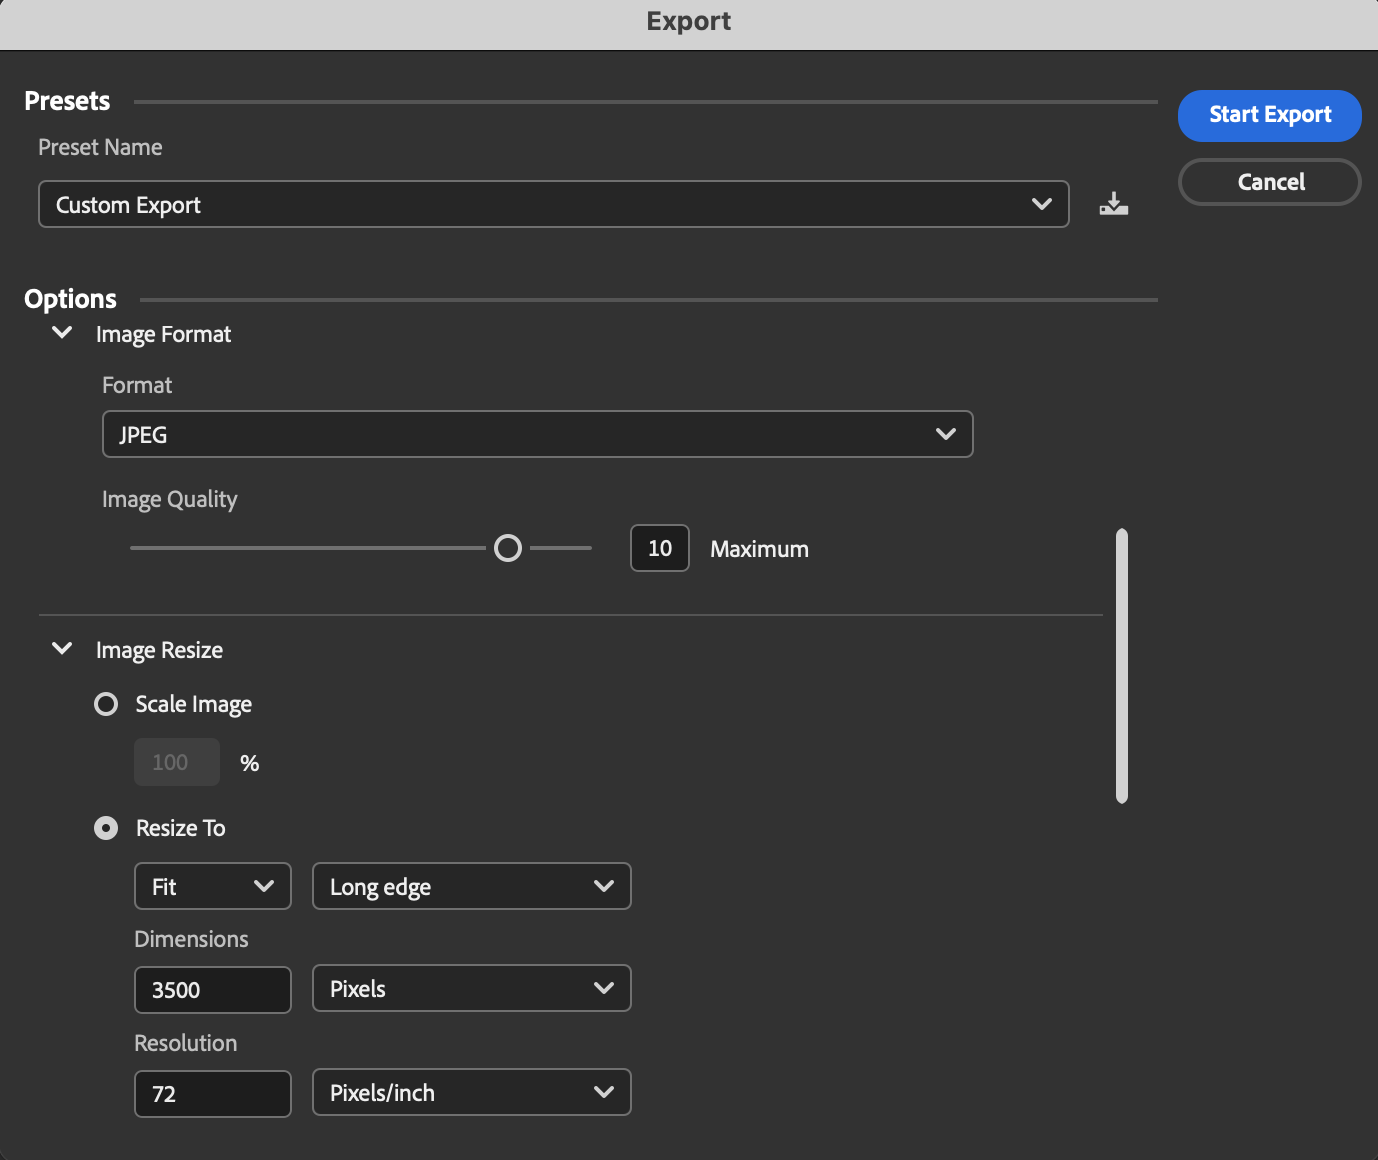
After renaming your images, you can resize and compress them. To do this, select all your images and go to File > Export To > Custom Export. A new Export window will then pop up. Below are recommended specifications to note when resizing your images:
-Destination: The destination allows you to select (or create a new) location or folder where your images will be saved.
-Format: The format is where you can change the file type, but I would encourage you to keep your photos as a .jpeg which is best for most website cases.
-Quality: The quality allows you to set the quality of your image as it relates to sizing. I keep my quality at 10 and set my max sizing to 300KB (but never higher than 500KB).
-Space: Make sure this is set to the RGB option because we are saving for web, not print.
-Image Resize: Make sure the “Resize To” option has been selected. Doing this will allow you to adjust your preferred width and height of the images. Showit suggests resizing your images to 3500px on the long edge (you can read more about that here). To do this select: Resize To > Fit > Long Edge > Dimensions: 3500px
-Resolution: Keep the resolution at 72 ppi (pixels per inch). This is another way to compress your images correctly for your website.
Once you have set your desired specifications, select “Start Export” and you will see that Adobe Bridge is saving these images to your desired location.
06. Double Check Your Newly Renamed and Resized Images
Once you’ve exported your newly renamed and resized images, take a few seconds to double-check to make sure they have been saved properly before uploading them to Showit or your Blog.
Even though it might seem like yet another step, when you batch rename and resize your website images using Adobe Bridge you end up saving time and ensuring your images aren’t slowing down your page loading speed, which ultimately will help with your SEO.
06. Celebrate Your Work!
Now it’s time to celebrate! In conclusion, your images are now ready to be used on your Showit website and blog! Hooray! 🎉
Want more helpful SEO tips like this? Unlock your website’s potential with our FREE Showit SEO guide.
Get your FREE Showit SEO Guide here! Want even more? Head to our Blog for more helpful SEO tips!
Save and Share This Post:


Let’s Stay Connected!
")


Get Your Free SEO Guide
Our free Showit SEO guide is here to help you take control of your website's visibility and achieve real results. With instant access, you can start seeing your SEO growth right away.
Free showit seo guide
Unlock Your Website's Potential With Our Free Showit SEO Guide


